
If you no longer want Microsoft 365 on your computer, you can easily remove it. Uninstalling Microsoft 365 is similar to any other program or application. The process for uninstalling a program can differ between Mac and Windows operating systems, so check out this support article for step by step instructions on uninstalling a program or application. However, if you encounter any trouble removing Microsoft 365, there is a tool that can help.
To automatically uninstall Microsoft 365:
- Navigate to http://support.microsoft.com/kb/2739501 and scroll down until you see Uninstall Steps for your installation type.
- Select the Click-to-Run or MSI uninstall steps.
- Locate Option 2- Completely uninstall Microsoft 365 with the uninstall support tool and click the Download button.
The File Download dialog box will appear at the bottom of the window. Depending on the browser you are using, you will click run, open, or save file in the File Download dialog box.
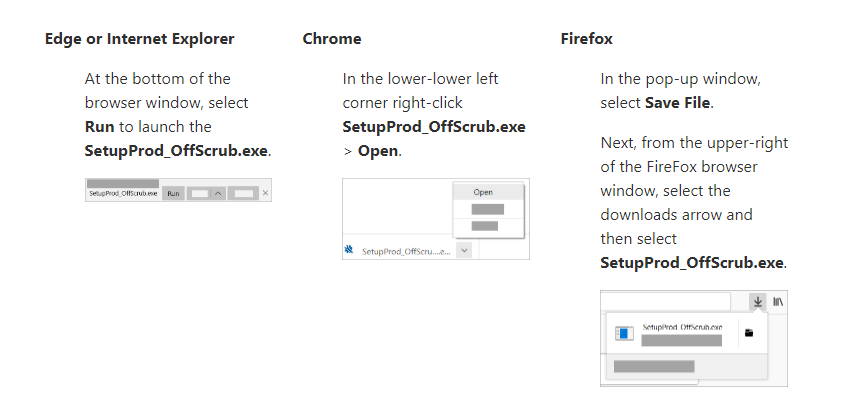
When the process is finished, click Open folder, find the file (the name should be SetupProd_offScrub.exe), and then double-click it to run the download. If you click Open, you may have problems when you run the download.
This will automatically remove Microsoft 365. Once it’s finished, make sure to restart your computer!
If you are on a Windows device, you may have a few additional steps involving the Microsoft Support and Recovery Assistant.
First, there will be a security warning to verify that you want to install the Microsoft Support and Recovery Assistant application. Select the Install option to continue.
Next, it should begin installing the application. It may take a few minutes for the installation to complete.
After the installation is complete, you will be prompted to acknowledge the Privacy Statement. Select I agree to continue.
On the next page, it will ask you to select the Microsoft 365 products you wish to uninstall. Select the product by clicking on the checkbox, then select Next.
Now it will have you confirm the uninstallation. At this time, make sure any work or documents you have open are saved and closed, since you may need to restart your device shortly. Check the box next to the acknowledgment, then select Next.
Now you will be on a page that says Troubleshooting the issue and the Microsoft Support and Recovery Assistant will begin uninstalling Microsoft 365. Please keep in mind that this may take a few minutes depending on computer speed.
Once the uninstallation is complete, you will be prompted to restart your computer. After restarting, your computer will be good to go!
Removing Microsoft 365 License Files on a Mac
The license removal tool helps to remove all current Microsoft 365 licenses that are on your Mac computer.
-
To automatically uninstall Microsoft 365 licenses, navigate to How to remove Microsoft 365 license files on a Mac and click Download the license removal tool.

- Next, open the .pkg file located in your Downloads folder.
-
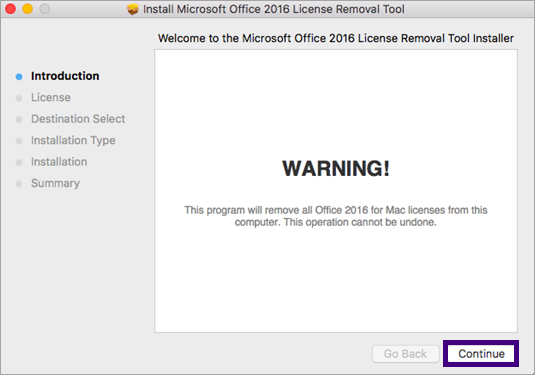
Select Continue to follow the steps in the set-up wizard.
-
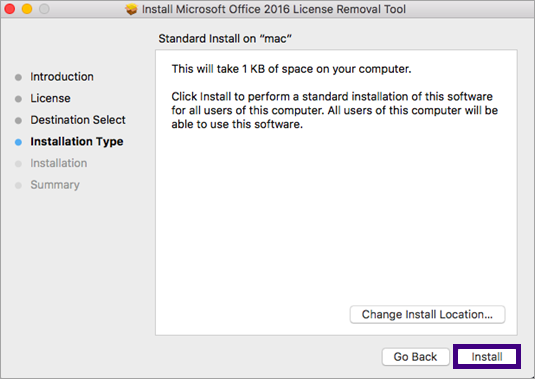
When completed, select Install. You will then be prompted to enter in your administrator username and password. Once completed, select Close.
- You may now sign into your Microsoft 365 with your GCU email address and password.